GNUPG
Intro(GnuPG) #

基本概念 #
Tip
Key 管理是 GPG 的核心功能,GPG Key 不能简单的理解为非对称加密的 Private Key / Public Key / Key Pair。GPG Key 由如下信息组成:
Key ID: 该 GPG Key 的唯一标识,值为主公钥的指纹,支持多种格式(Fingerprint, Long key ID, Short key ID),更多参见:What is a OpenPGP/GnuPG key ID?。
UID: 1 个或多个,每个 UID 由 name、email、comment 组成,email 和 comment 可以为空。
Expire: 过期时间,可以为永久。
多个具有不同用途的非对称加密算法中的 Key 的集合。key 分类参见下表
主秘钥和主公钥(Primary Key)、子秘钥和子公钥(Sub Key)都是成对出现的,其用途也是一致的。
每一对都包含一个 key id 属性(为 public key 的指纹),其中主密钥/主公钥的 key id 就是当前 GPG Key 的 Key ID。类型 全名 缩写 用途 (Usage) 说明 主公钥 Public Key pub SC 每个 GPG Key 有且只有一个 主公钥,可以选择一种或多种 Usage 子公钥 Public Subkey sub S/A/E 每个 GPG Key 可以有多个子公钥,每个子公钥可以选择一种或多种 Usage 主私钥 Secret Key sec SC 每个 GPG Key 有且只有一个 主私钥,可以选择一种或多种 Usage 子私钥 Secret Subkey ssb S/A/E 每个 GOG Key 可以有多个子私钥,每个子私钥可以选择一种或多种 Usage 用途参见下表
缩写 全名 用途 C Certificating 管理证书,如添加/删除/吊销子密钥/UID,修改过期时间。 S Signing 签名,如文件数字签名、邮件签名、Git 提交。 A Authenticating 身份验证,如登录。 E Encrypting 加密,如文件和文本。 安装 #
# 1. 源码安装
# https://www.gnupg.org/download/index.en.html./configuremake && make installsudo apt-get install gnupgyum install gnupgbrew install gnupg基本操作 #
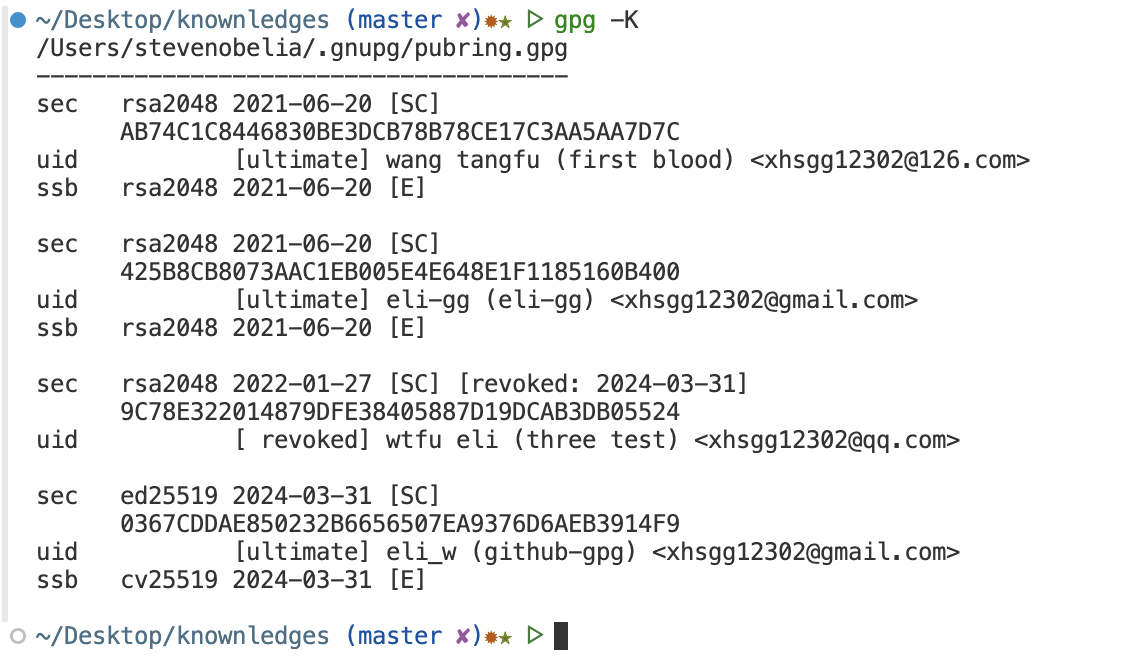
1. 查看公匙和私匙 #
Tip
gpg -k/-K [--keyid-format {none|short|0xshort|long|0xlong}] [KEYID]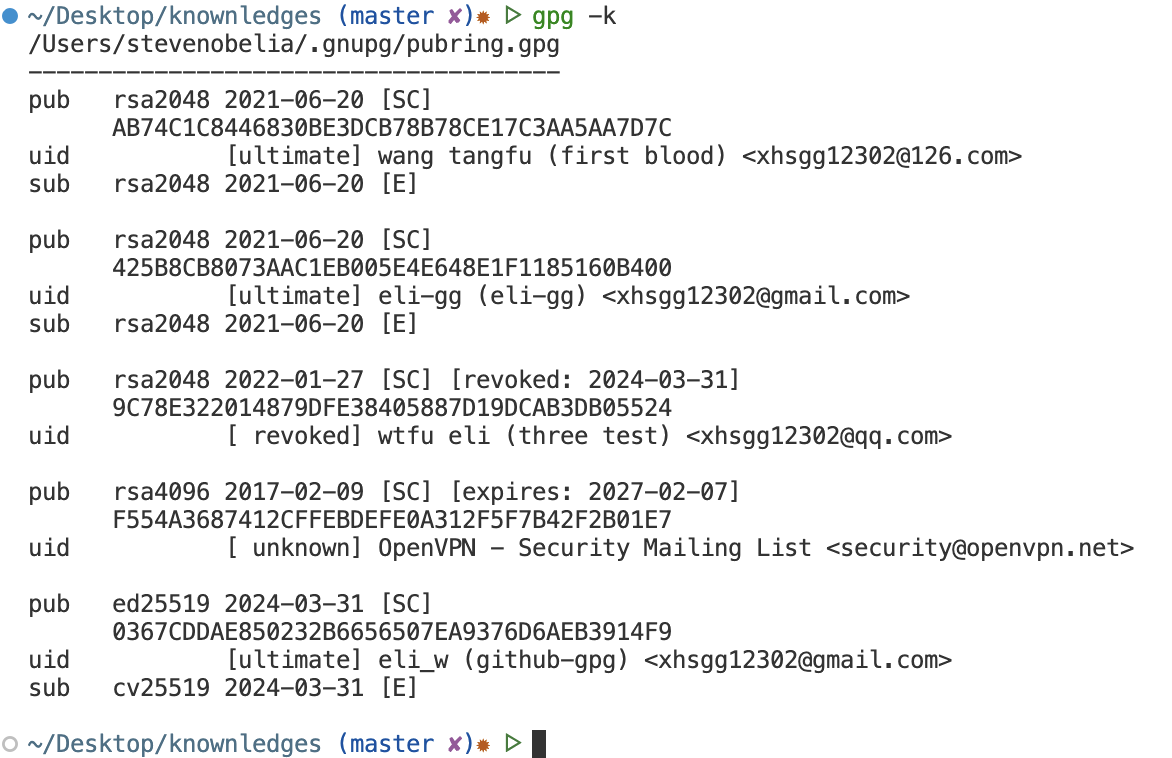
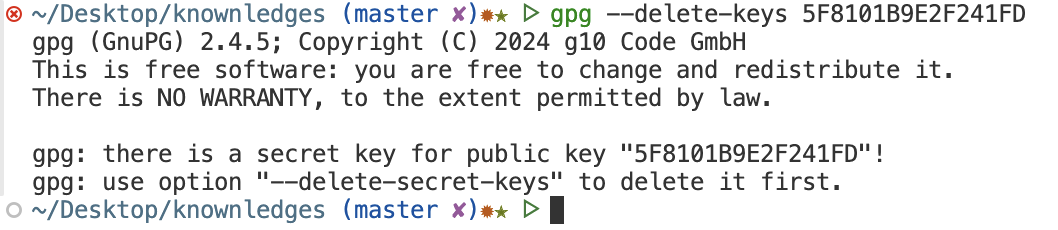
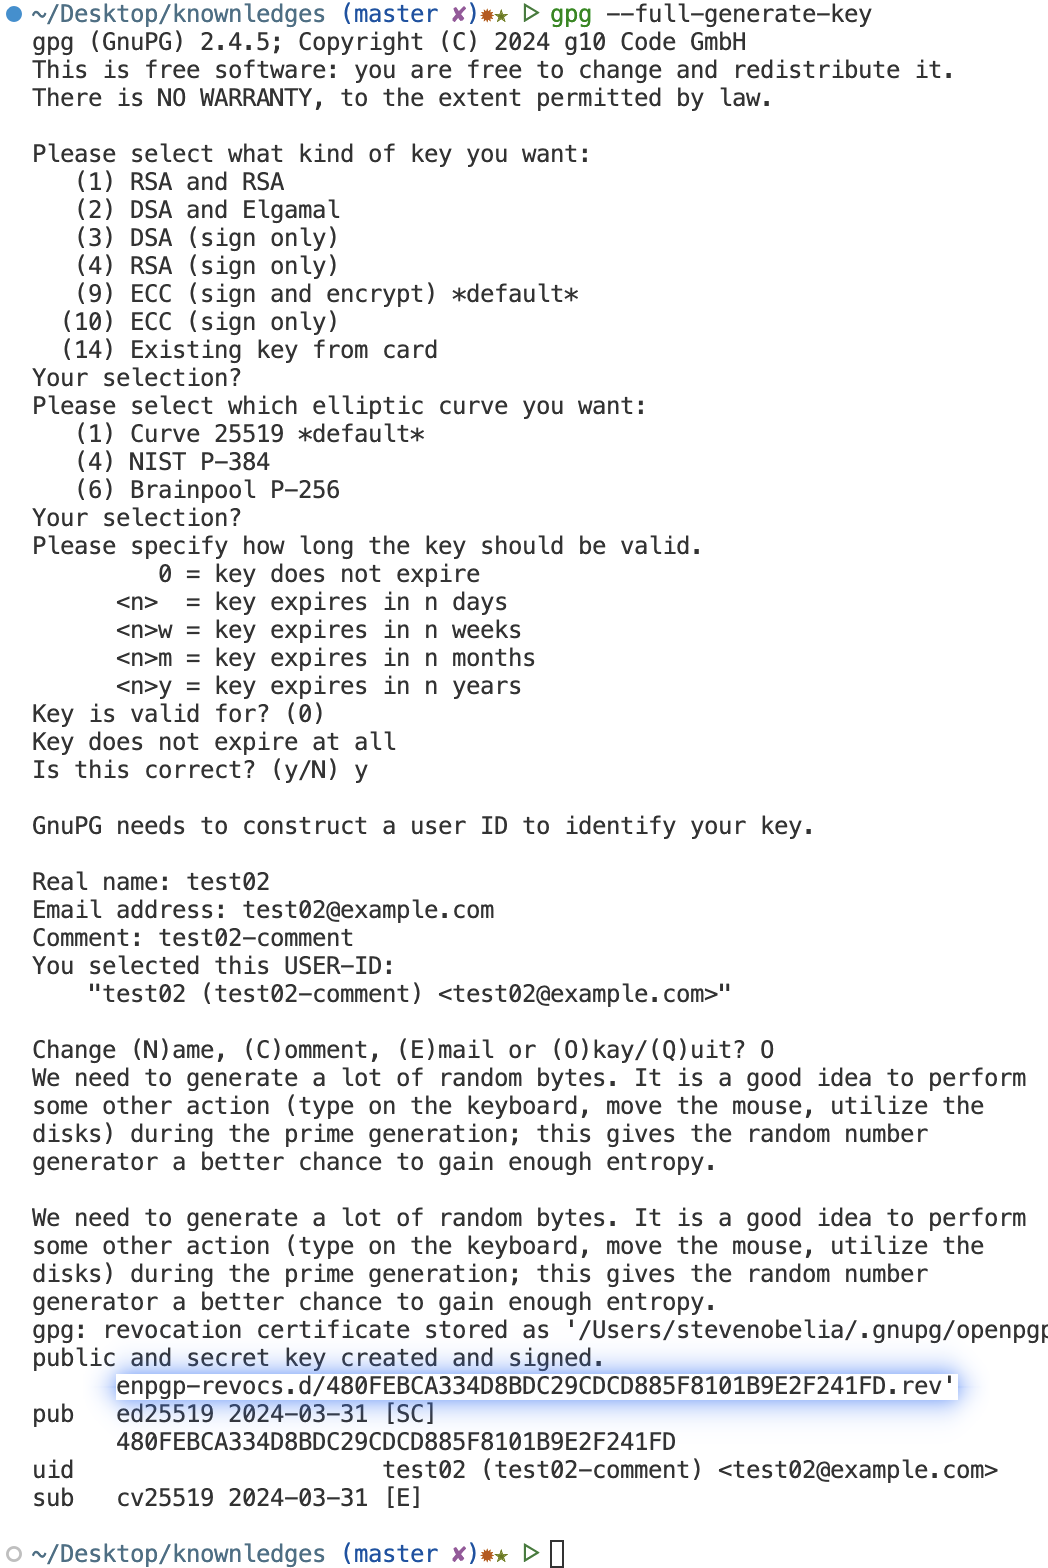
2. 生成与删除公私匙 #
Tip
gpg [--generate-key | --full-generate-key]gpg --delete-secret-keys <KEYID>gpg --delete-key <KEYID>。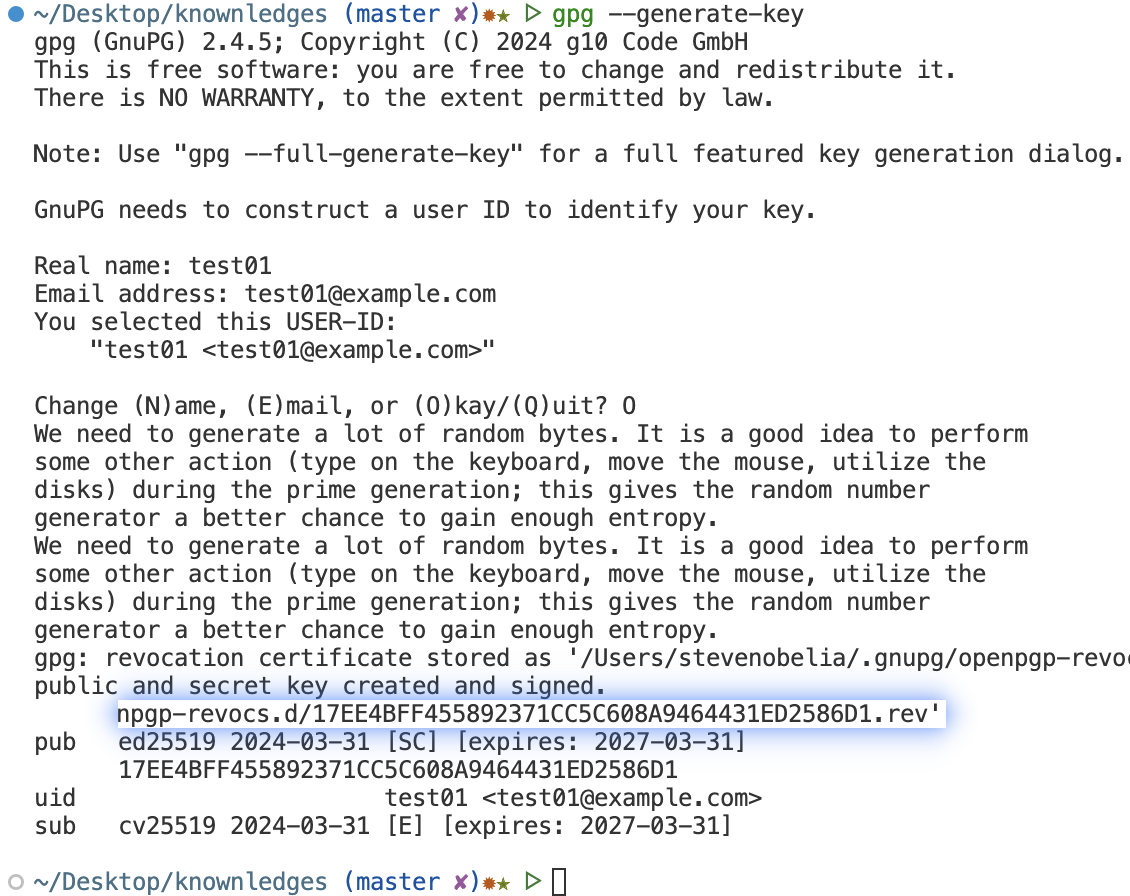
Caution
删除的时候得先删除私匙
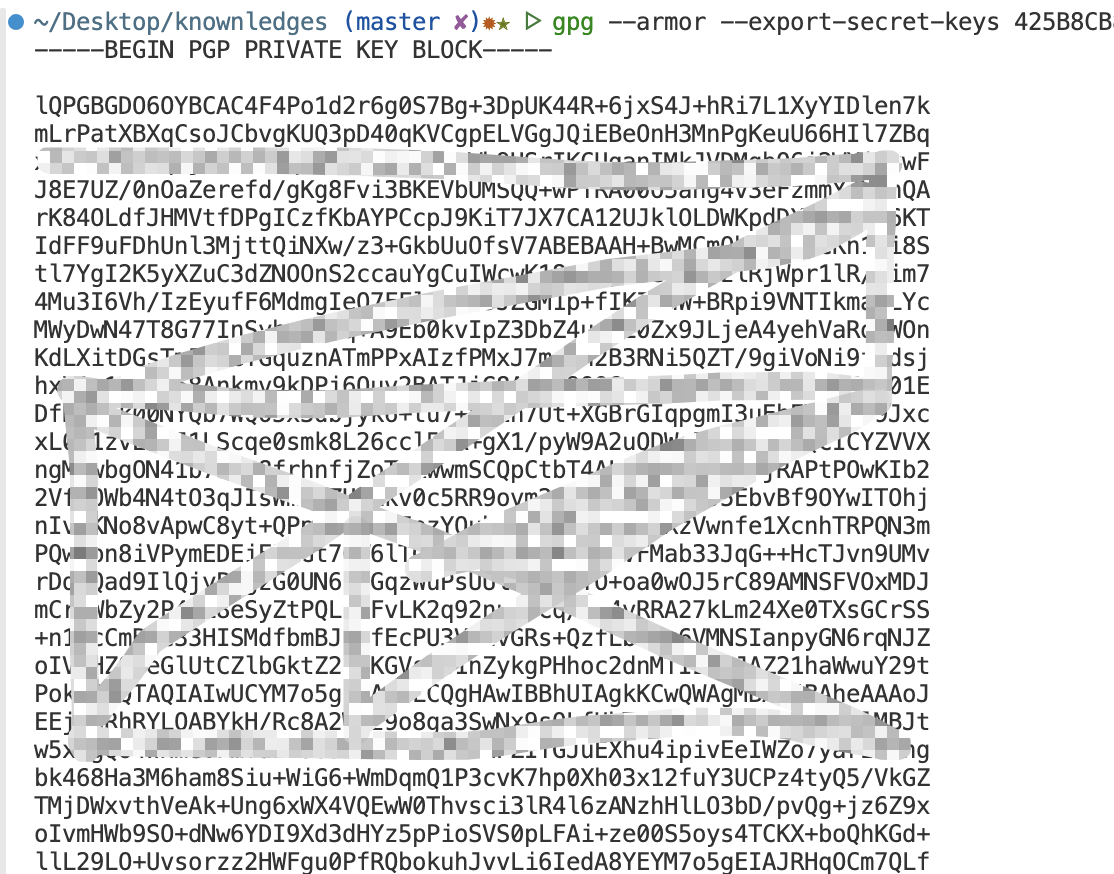
3. 输出密匙 #
Tip
gpg --armor [-o xx.txt] --export [KEYID]gpg --armor [-o xx.txt] --export-secret-keys [KEYID]
4. 查看公匙指纹 #
Tip
gpg --fingerprint [KEYID]
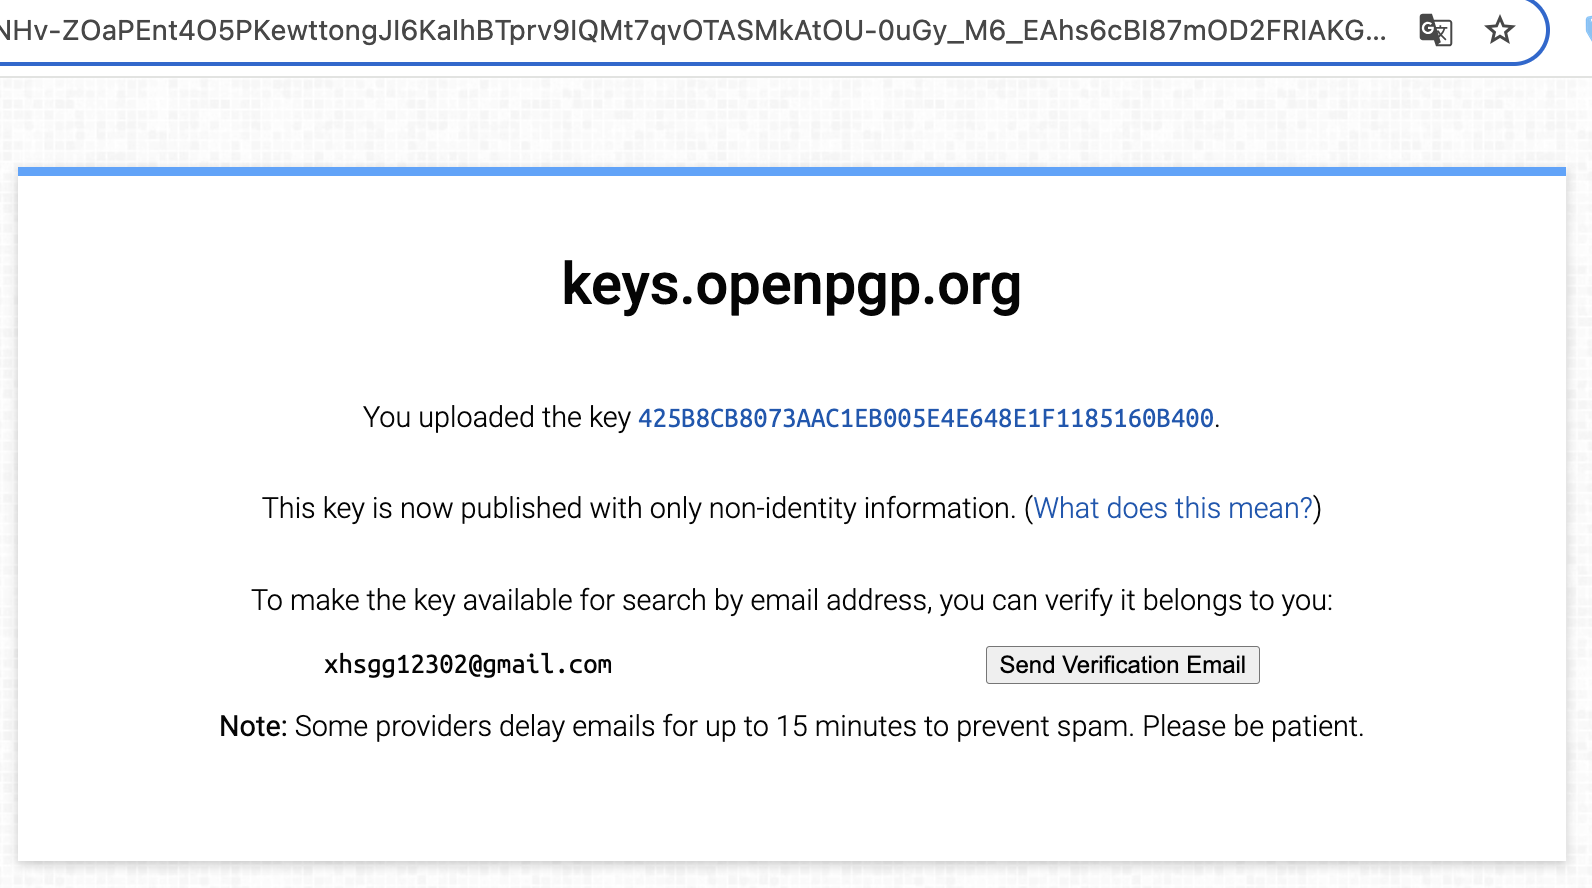
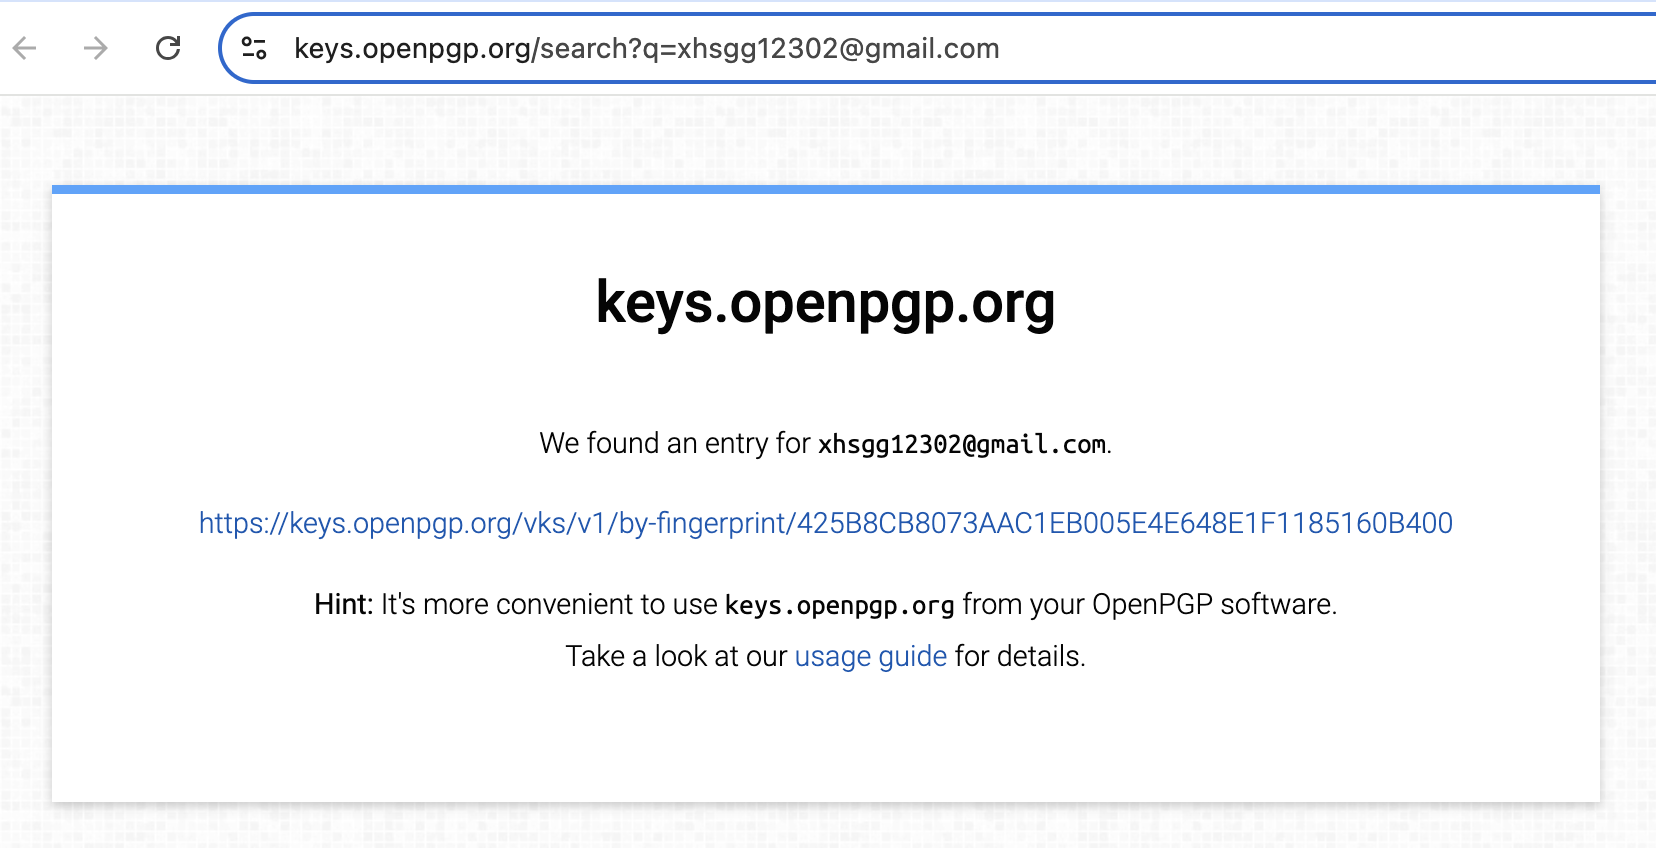
5. 上传公匙 #
Tip
有如下方式:
1.: 通过 gpg--send-keys方式。gpg --keyserver hkp://keyserver.ubuntu.com --send-keys [KEYID]gpg --keyserver hkps://keys.openpgp.org --recv-keys [KEYID]--keyserver nameThis option is deprecated - please use the –keyserver in ‘dirmngr.conf’ instead.
2.: 通过 curl 方式。 参考gpg --export 425B8CB8073AAC1EB005E4E648E1F1185160B400 | curl -T - https://keys.openpgp.org
6. 导入公匙 #
Tip
gpg --import [file]
加密签名 #
demo txt
hello world;
最近怎么样,我正在学习gpg。加密 #
Note
gpg --recipient 425B8CB8073AAC1EB005E4E648E1F1185160B400 --output demo.en.txt --encrypt demo.txt
解密 #
Note
gpg --armor --decrypt demo.en.txt
签名 #
Note
gpg --sign demo.txt
生成 demo.txt.gpg 文件,这个文件默认采用二进制储存,如果想生成ASCII码的签名文件,可以使用--clearsign参数,生成 demo.txt.asc 文件
如果想生成单独的签名文件,与文件内容分开存放,可以使用--detach-sign参数。生成一个单独的签名文件 demo.txt.sig 。该文件是二进制形式的,
如果想采用ASCII码形式,要加上armor参数。gpg --armor --detach-sign demo.txt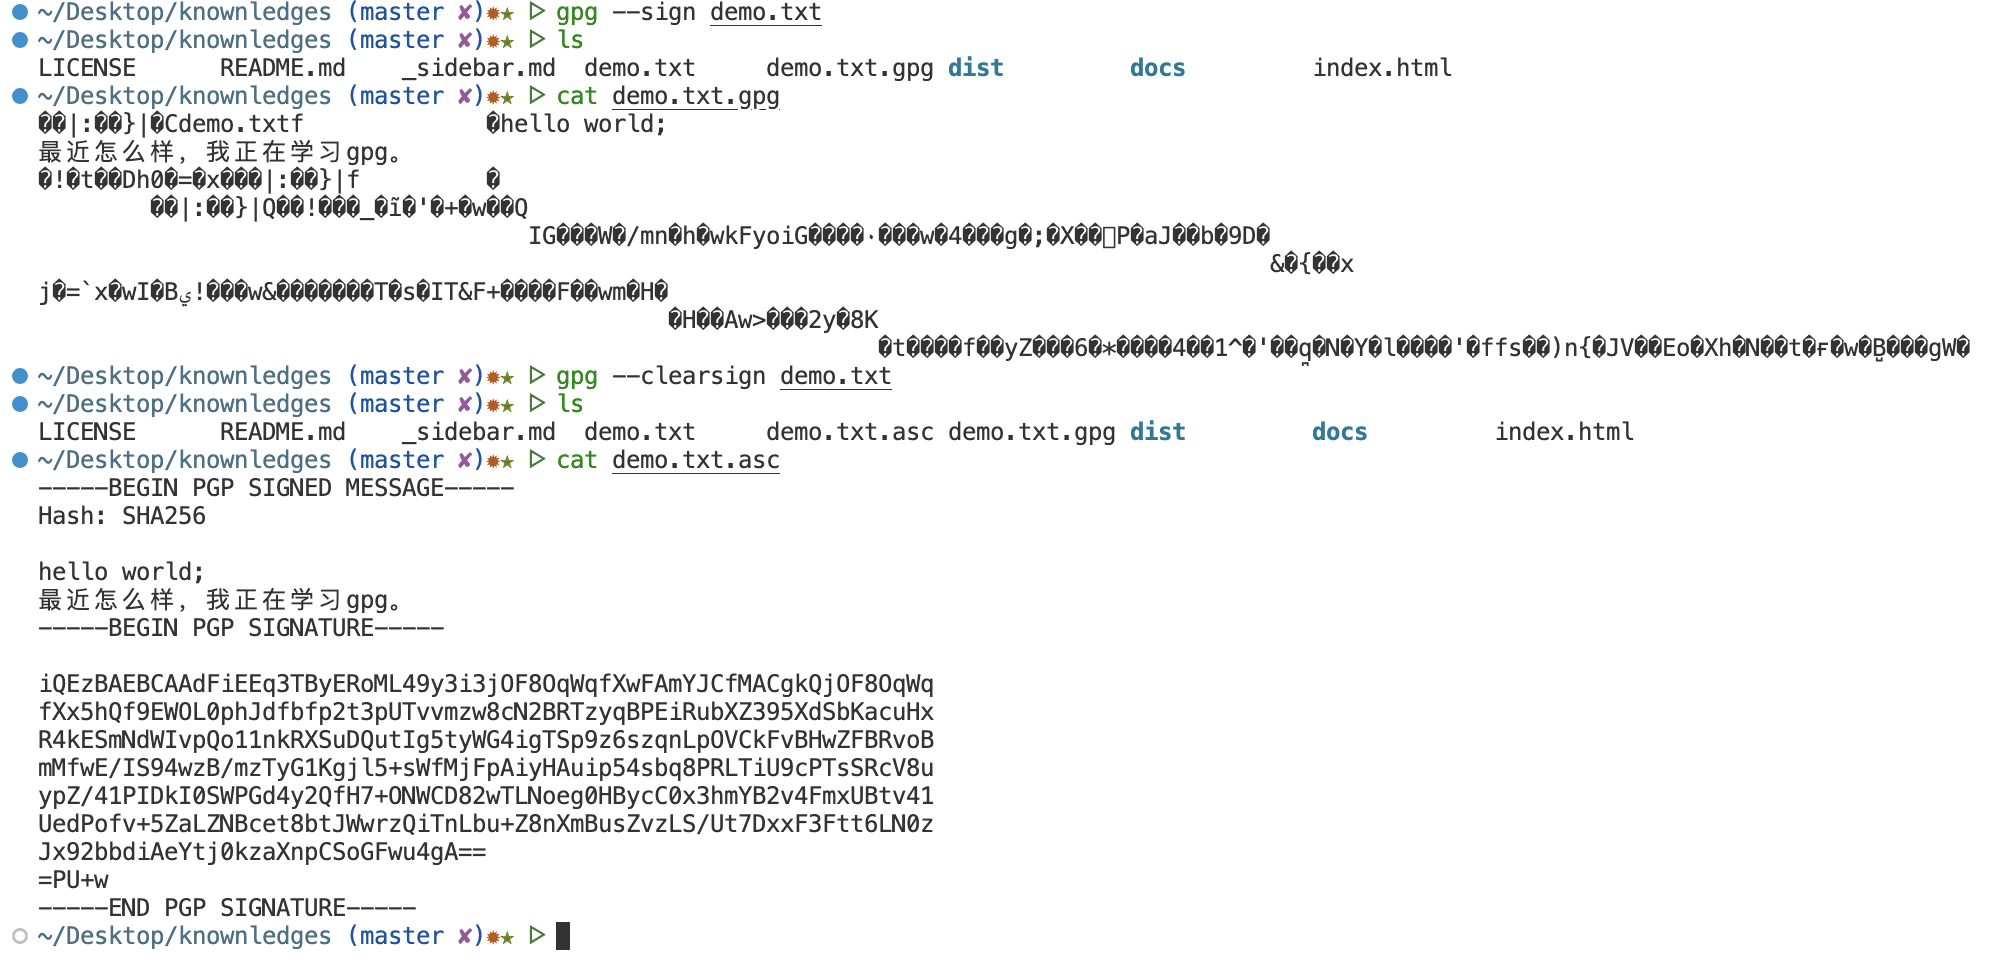
验签 #
Note
gpg --verify demo.txt.asc
出现: WARNING: not a detached signature; file ‘demo.txt’ was NOT verified!
是因为附近有’demo.txt’文件造成的。可以理解为这不是一个单独的签名文件。如果同级目录存在’demo.txt’,不对其进行hash验签。
可以重命名’demo.txt’或者使用--detach-sign来消除警告。 参考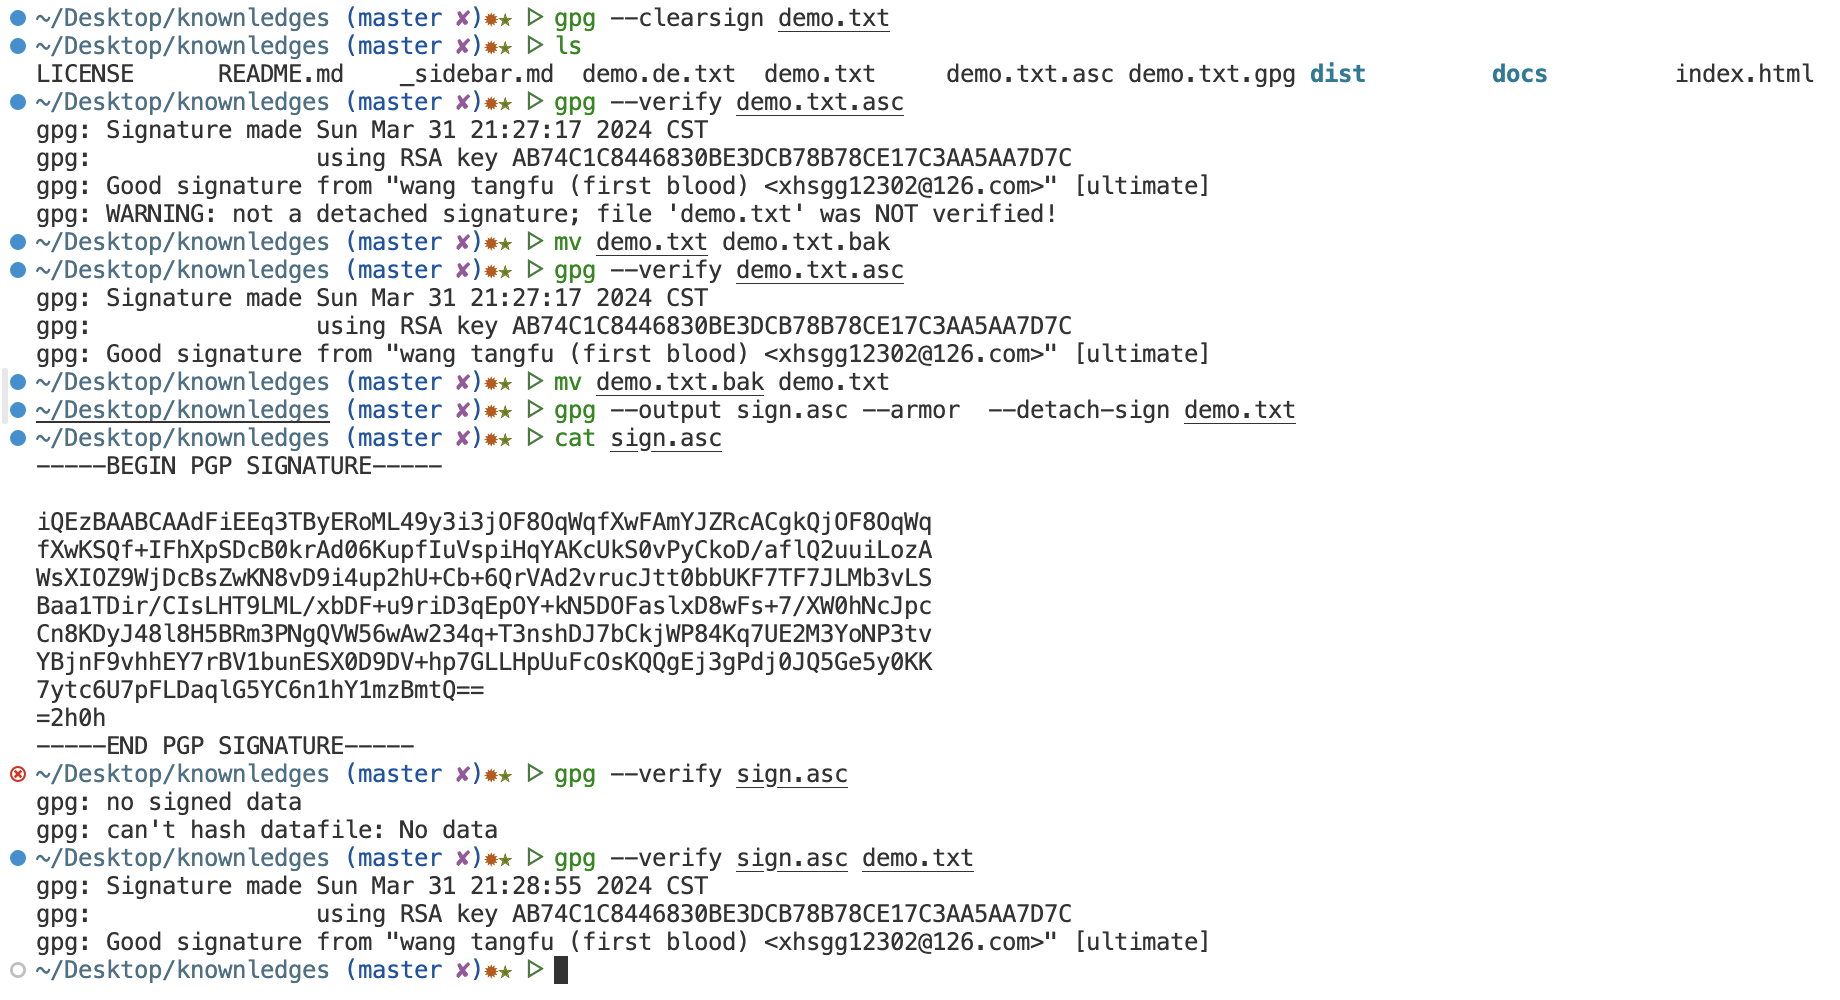
签名➕加密 #
Note
gpg --local-user [发信者KEYID] --recipient [接收者KEYID] --armor --sign --encrypt demo.txt
local-user参数指定用发信者的私钥签名,recipient参数指定用接收者的公钥加密,armor参数表示采用ASCII码形式显示,
sign参数表示需要签名,encrypt参数表示指定源文件。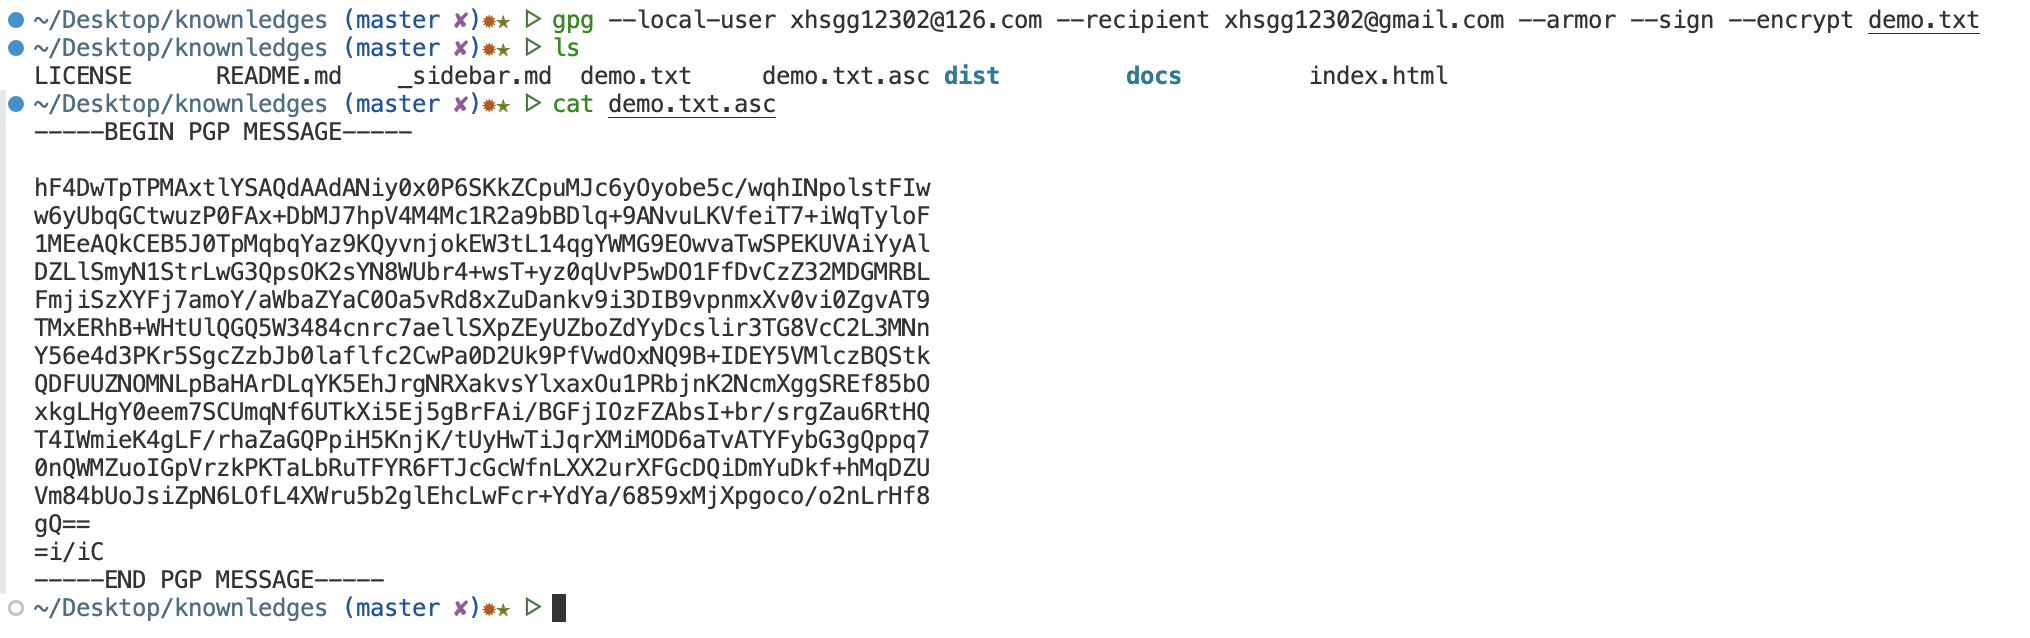
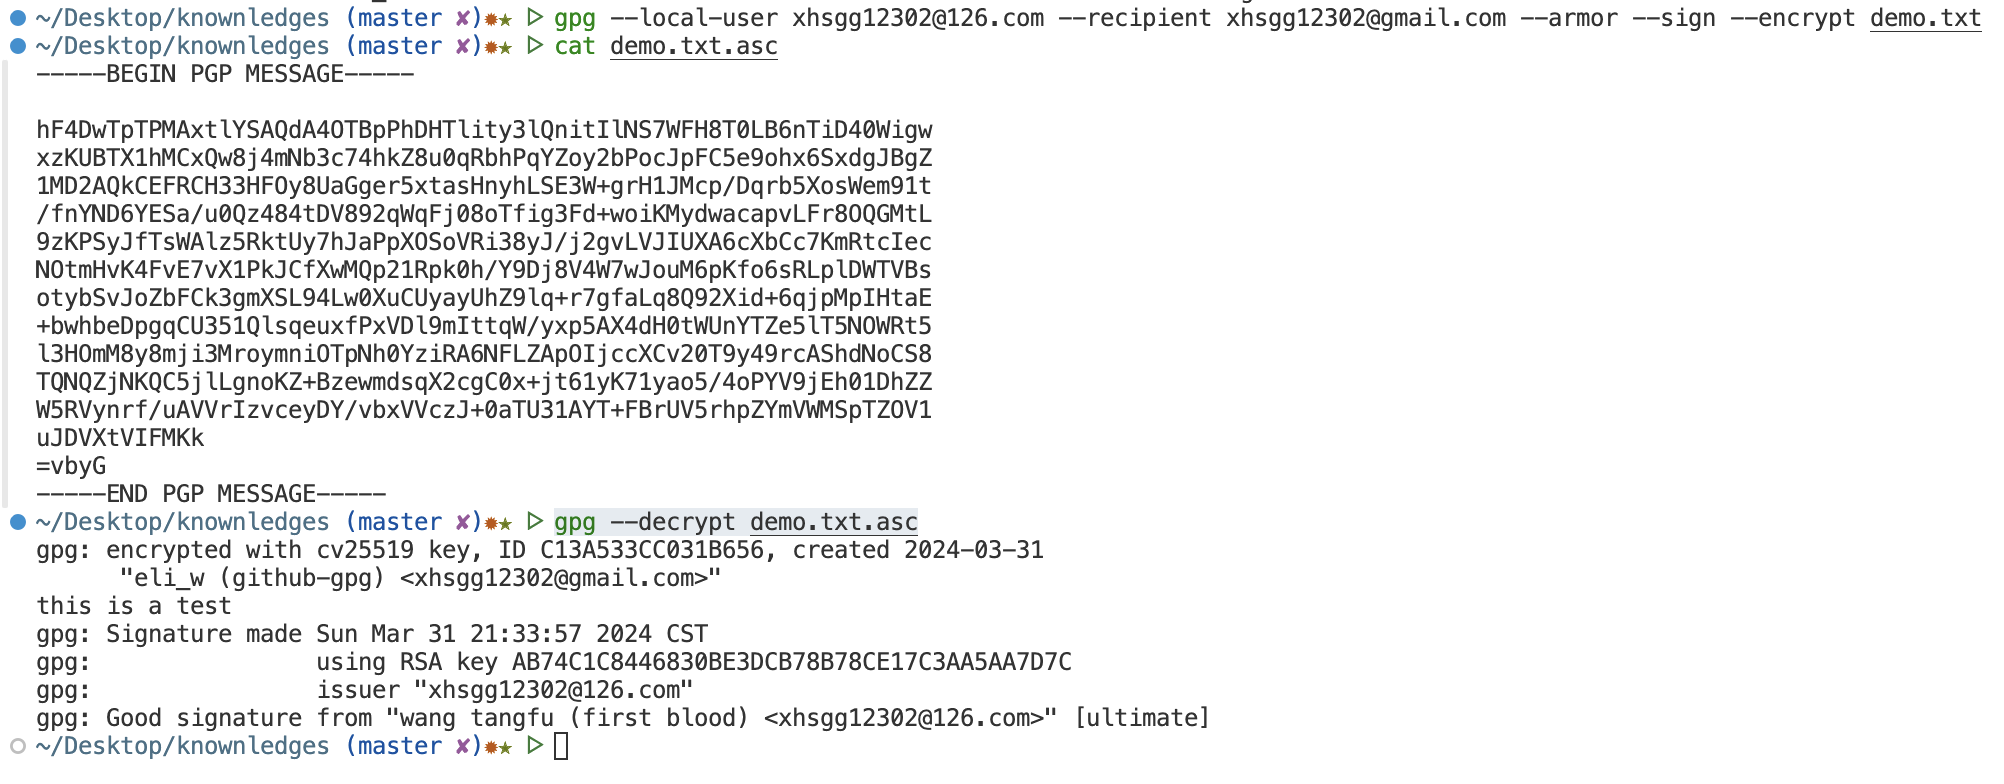
解密➕验签 #
Note
gpg --decrypt demo.txt.asc
将上述步骤生成的demo.txt.asc进行解密验签名。Caution
需要注意的是:不能单独验证,可能是因为先加密的原因,需要解密后才可以看见签名,发现签名后顺带验证签名了。
其他样例 #
公用服务器 #
GnuPG套件 #
Note
gpg有很多的辅助程序,比如
gpg-agent,dirmngr。
重启agentgpg-connect-agent reloadagent /bye
查看agentgpg-connect-agent 'keyinfo --list' /bye
查看keygripgpg --with-keygrip -K 425B8CB8073AAC1EB005E4E648E1F1185160B400
使用 keygrip 缓存密码"$(gpgconf --list-dirs libexecdir)"/gpg-preset-passphrase --preset <keygrip>回车后输密码,用于自动化。(需要在gpg-agent中开启allow-preset-passphrase选项)
使用 keygrip 清除缓存"$(gpgconf --list-dirs libexecdir)"/gpg-preset-passphrase --forget <keygrip>
清除可能会报错: gpg-preset-passphrase: clearing passphrase failed: No inquire callback in IPC(原因暂时未知),但是不影响密码的清除。
或者通过重启 agent,全部清除。
IPC connect call failed #
Reference #
- https://wiki.archlinuxcn.org/wiki/GnuPG
- https://unix.stackexchange.com/questions/512173/gpg-gpg-preset-passphrase-installation
- https://unix.stackexchange.com/questions/614737/how-to-cache-gpg-key-passphrase-with-gpg-agent-and-keychain-on-debian-10
- https://superuser.com/questions/1539189/gpg-preset-passphrase-caching-passphrase-failed-not-supported
- GPG入门教程 | ruanyifeng
- https://www.hacksanity.com/kb/gnupg-part-4-encrypt-sign-files/
- https://loganmarchione.com/2015/12/a-brief-introduction-to-gpg/
- openvpn | GnuPG Public Key
- python3.10.6 gpg
- https://www.rectcircle.cn/posts/understand-and-use-gpg/
- https://www.zhihu.com/question/60520344/answer/531709554
- https://github.com/rvm/rvm/issues/4215
- gpg: signing failed: Inappropriate ioctl for device